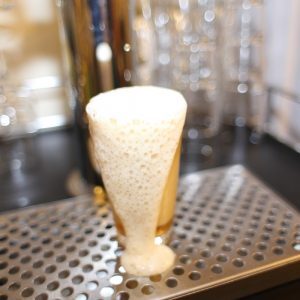
One of the more common questions we get is why is my kegerator pouring mostly foam? Although it's a common issue it's not usually an hard one to fix. Follow these steps to understand why beer foams up and how to stop it.
With a kegerator system you will usually get a little bit of foam with the first pour as the tap cools down. A font fan will help to reduce this, they can be purchased separately but do come standard in all our Keg Master kegerators. Commercial pubs use glycol chilled fonts to keep the taps icy cold and are usually pouring beers more frequently than on a home kegerator. If you are consistently getting foam this may be caused by a variety of issues.
Pouring Technique
A lot of people have never really poured a beer from a tap system in their life as it is usually done by a well-respected employee behind the bar. Unlike a kitchen tap you want to turn a beer tap fully on and then fully off. Don't try to adjust the pour rate by half opening the tap. Pouring with the glass on an angle with the least amount of distance between the stream of beer and the glass is ideal. Keeping your glassware clean will also help to keep foaming to a minimum.
Temperature
The first thing to check is that the beer is cold enough, it is best to pour a glass of beer and measure the temperature in the glass so you know what temperature it is coming out the tap. Even if the display on the fridge says one temperature and the beer feels cold, the beer coming out of the centre of the keg may be warmer. If the temperature is above about 2-4C you will have issues regardless of your setup. It can take 24 - 48 hours to fully chill down a 50L keg.
Pressure in the Keg
It is a common mistake to adjust the pressure in the keg to speed up or slow down the flow rate. While this may work for a day or two the pressure needs to be a certain level to maintain the correct carbonation level. For typical carbonation beers (most pale ales, lagers & commercial beer) this will be about 11 psi when the beer is about 2C. If the beer is warmer or it has a higher level of carbonation you will need a higher pressure. Once the pressure is set you may need to release any excess pressure in the keg if the regulator has previously been at a higher pressure. It is best to do this on the keg or coupler rather than the regulator so that liquid doesn’t go up the gas line and ruin your regulator.
'Balance' Your System
If the temperature and pressures are correct and you're still having issues your system may not be balanced. Balancing is applying the correct flow resistance to ‘balance’ the pressure in the keg so that it won’t pour too quickly. You want to aim to pour about 285mL in 10 seconds. If it is coming out the tap quicker than this it will cause too much turbulence and will foam up in the glass just like shaking a can of beer.
Flow resistance can be calculated by measuring the elevation from the keg to the tap as well as the inner diameter of the beer line (fluid friction) and of course the length.The most common way of adjusting flow resistance is to change the length of the beer line. Depending on the internal diameter (ID) of the beer line you will need a different length. As a general rule of thumb for beer stored in a kegerator at 11 psi you will need one of the following between the keg and the tap.
1.5 to 2.5 meters of 4mm ID – Tighter than a pair of skinny jeans to get on your barbs but can be done with help from boiling water and a pair of needle nose pliers. 4mm is definitely worthwhile if you want less line in the fridge to look neater.
3 to 4.5 meters of 5mm ID – The most common beer line size that comes standard with all of our Series 4 Keg Masters.
5 to 10 meters of 6mm ID – As you need such a long length of this line it isn't practical for most kegerators. It is only used if the tap system is far away from the kegs in cold storage or using another cooler with lots of resistance already.
Flow control taps can also add some resistance but you will still need to get in the ball-park with the beer line length. They are particularly useful if you're changing between beers with different carbonation levels.
Still Having Trouble?
Your system should be now set-up correctly, if you are still having issues with it foaming the beer is likely over carbonated. This can happen if any beer is kept at a high pressure for a period of time or excessively force carbonated which we will touch on in another article. If you are seeing bubbles in the line when the beer is cold and the system balanced this is an indication it is over-carbonated.
Beer can also become over-carbonated when nasty bugs eat up the remaining unfermentable sugars (unfermentable by brewing yeast) and over carbonate an already carbonated beer. It is quite rare for this to happen, but you will know by extreme gushing, nasty tasting beer or extreme dryness in the finished product.
You can reduce the carbonation by releasing the pressure in the keg, and keeping the relief valve open for a period of time. This will happen slowly when the keg is cold, and much faster if you let the keg warm up. It is hard to know how over-carbonated the beer is so it is a bit of guess work to get it back to the proper level. You can start with the beer out of the fridge with the relief valve open for about 6-8 hours, then chill and taste, repeat if necessary.
If all else fails and you’re still pulling foamy beer, then something may be wrong on the equipment side. Pulling your tap apart and checking the seals should be the first thing you do. Check for kinks in your lines or blockages in poppets, disconnects etc. If you’re still pouring foam contact us and we’ll discuss your problem further.